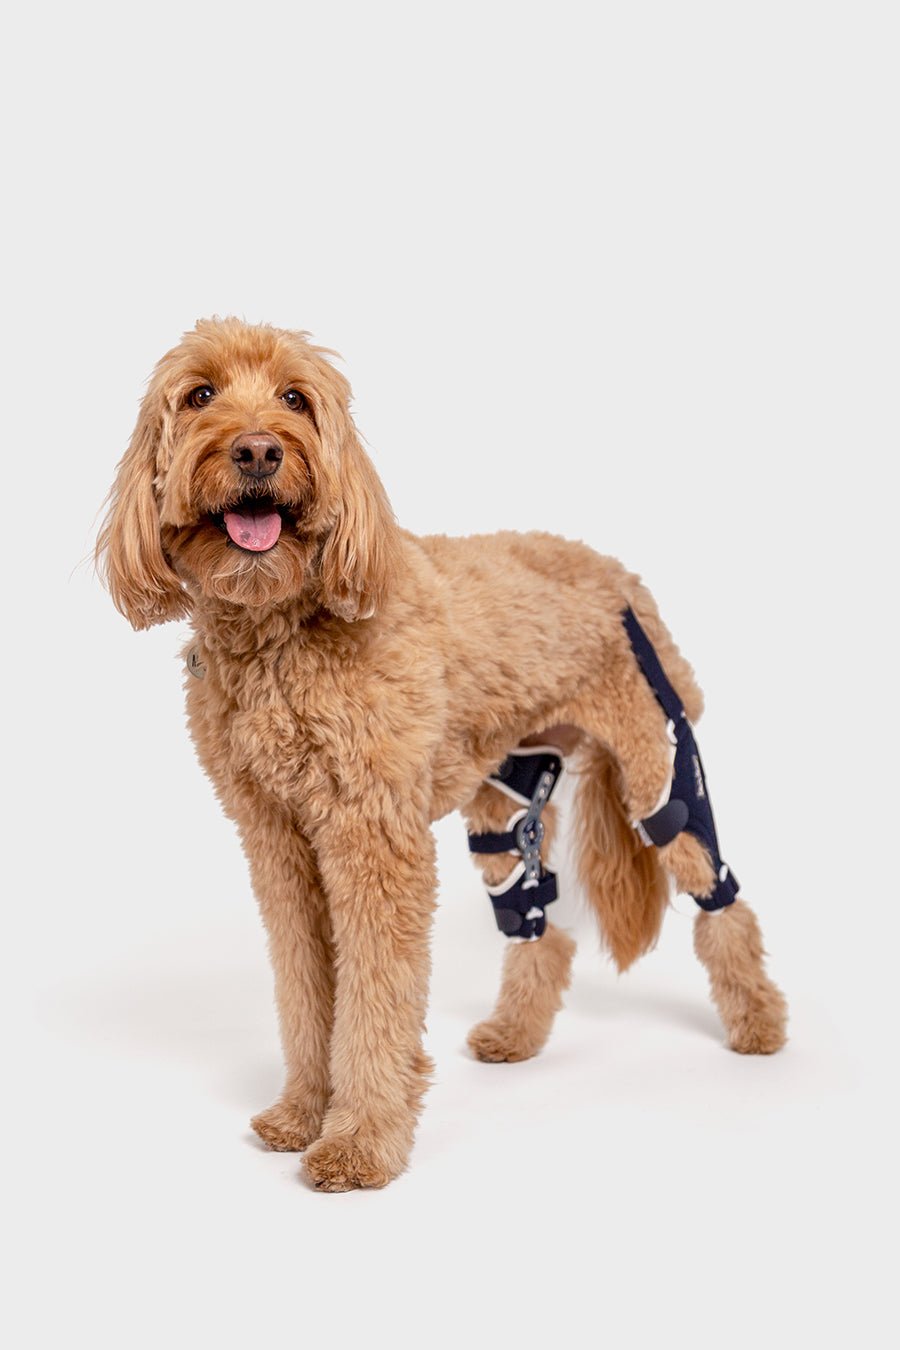
Sophisticated bracing for an affected leg and support of the at-risk knee. Allows for an adjustable range of motion of an injured limb and protective support for the compensating canine knee.
BILATERAL SUPPORT FOR
Post-surgical/ post-TPLO knee support
Healthy or at-risk knee while compensating the weight of injured leg
The Balto® Ligatek is carefully designed to stabilize your dog's post-traumatic or acquired knee joint deficiency. With its adjustable hinges, the user can control the ROM (range of motion), and lock the injured knee joint into full immobilization or controlled degrees of flexion/extension.
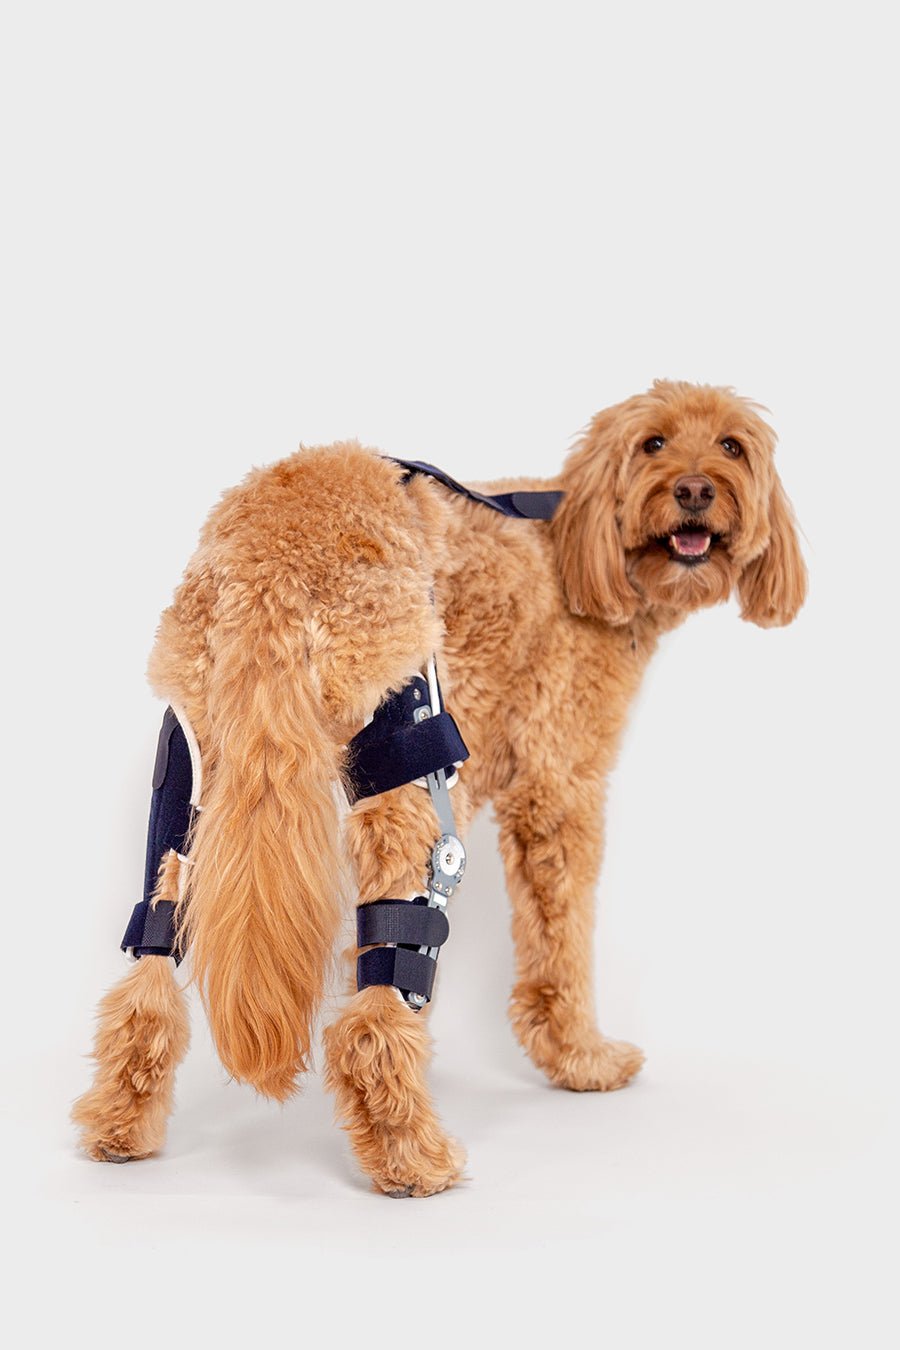
In canines with knee injuries, there is a 70% chance of injury to the other knee from additional weight and wear while the injured leg rehabilitates. When the Ligatek is paired with the Balto Jump, the Jump is able to provide structural support – ensuring healthy movement of the at-risk joint.
BRACE APPLICATIONS
This bracing bundle is intended for the support of 2 injured knees, or 1 at-risk knee and 1 affected knee.
This brace can be used on healthy joints, muscles and ligaments to prevent injury to at-risk knees
CCL tears (partial and full)
Partial CCL tears can take about 6 months to stabilize, and up to a year to form mature scar tissue to stabilize the knee to regular function.
Full CCL tears, depending on severity, can take up to a year to stabilize and an additional year to form mature scar tissue that can stabilize the knee to regular function.
Post-surgical support (for surgeries such as TPLO, TTA, ELSS, and MPL)
Structural support to injured or affected limbs
Special circumstances or conservative treatment preference; bracing can be used as an alternative to surgery for ineligible surgical candidates.
BRACE FEATURES
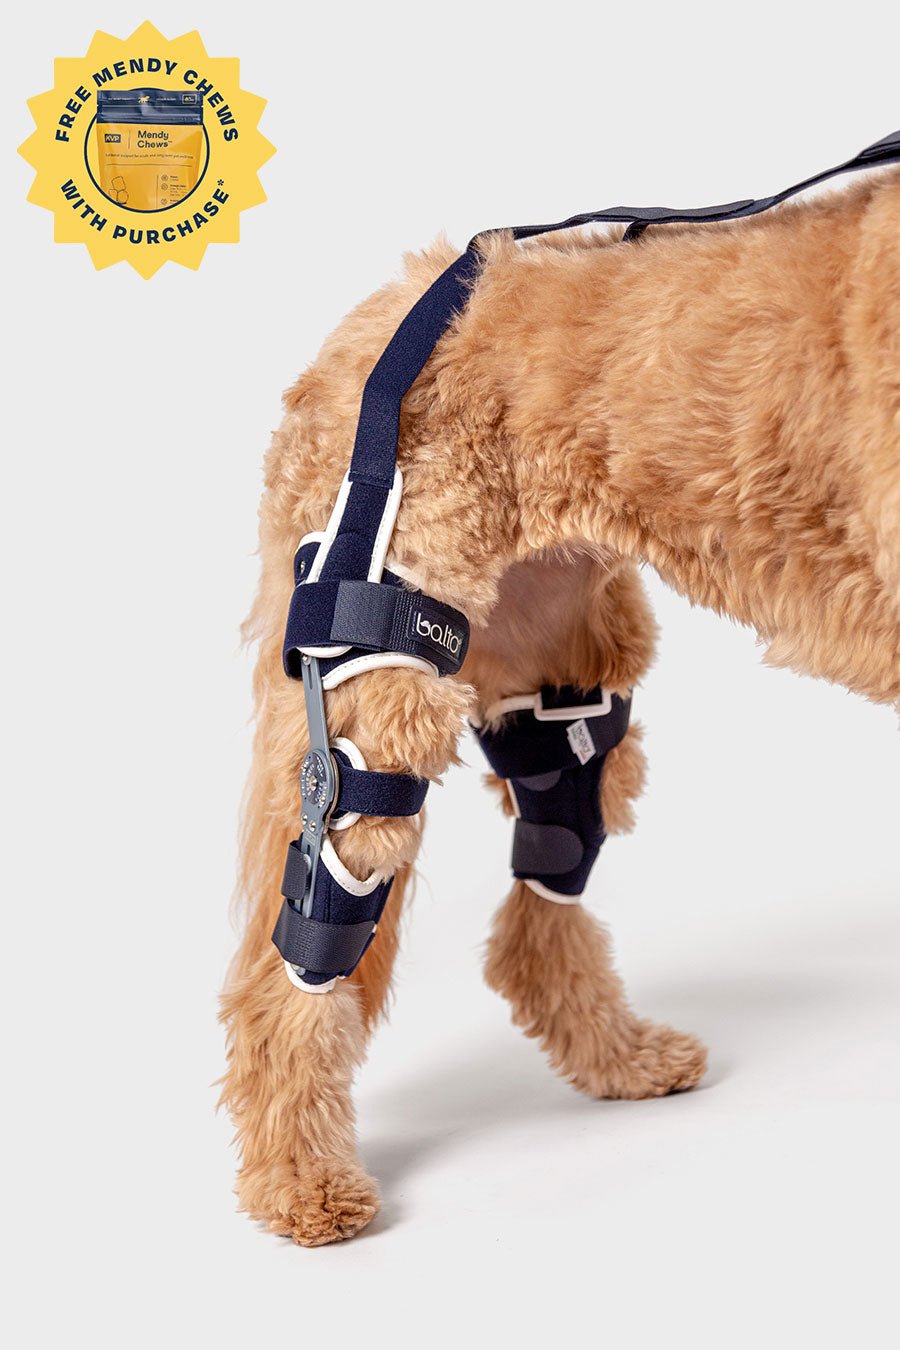
The Ligatek comes with adjustable upper and lower hardware that can be lengthened or shortened on the leg to ensure an excellent fit.
The Jump comes with 2 pockets containing angled airplane aluminum splints on either side of the knee to promote healthy drawer movement of the knee.
Two durable straps: one over the hind end to anchor both knee braces together and the other to stabilize by attaching to a harness or collar
Knee braces can be used together, or can function as singular knee support when separated.
The Balto Jump can be used without splints for conditions such as arthritis and arthrosis.
Compression helps increase blood flow in the affected area, which helps reduce stiffness, pain, and inflammation
Please note that sizing differs between braces. The Balto Jump comes in sizes x-small through x-large, for left and right orientation. The Balto Ligatek comes in sizes small through x-large. To find the best size for your pet, visit the sizing chart here.
All Balto® braces are made from high-quality materials, not neoprene, which is known to: collect bacteria, provide inadequate support, and wear down quickly. A variety of sizes ensure a secure fit. No pinching straps.
Recommended for all ages unless otherwise advised by veterinarians. Apply brace for balanced increments of time, if appropriate, for pets under the age of 2 to prevent possible growth disturbances.
Used to stabilize both knees and provide compression bilaterally.
Used to stabilize both knees while one is recovering from surgery or undergoing rehab
Features
Each knee brace has splints on both sides of the leg for full immobilization (splints are removable)
One knee brace for full immobilization (Jump) and one knee brace for controlled range of motion (Ligatek)
Fit
Uses adjustable Velcro for a secure fit while the braces anchor together across the back.
How to Apply Brace
Step 1
Start by removing the anchor kit and applying the Jump to the left leg (see Jump "Instructions for Use") (Fig. 1 & 2).
(Fig. 1).
Step 2
(Fig. 2)
Step 3
From the Ligatek, keep only the back strap and remove the anchor that would wrap around the contralateral leg (Fig. 3)
(Fig. 3)
Step 4
Apply the Ligatek to the right leg (see Ligatek "Instructions for Use") (Fig. 4).
(Fig. 4)
Step 5
Apply the Velcro to the top of the Ligatek and add the back strap over the dog’s back (Fig. 5).
(Fig. 5)
Step 6
Insert it into the top buckle of the brace and tightly close with the Velcro strap (Fig. 6).
(Fig. 6)
Step 7
The back strap is adjustable: Remove the Velcro end and cut the strap to the desired length. Reapply the Velcro end and tightly close with the Velcro strap to ensure the brace is stable (Fig. 7 & 8).
(Fig. 7)
Step 8
(Fig. 8)
Step 9
Pass the collar strap under the collar or harness and attach the other strap under the back strap (Fig. 9-11).
(Fig. 9)
Step 10
(Fig. 10)
Step 11
(Fig. 11)
What is the Right Advanced Knee Plus?
This bundle provides support for both legs. If the right knee is going through rehabilitation or is healing post-surgery, the left knee is also protected against injuries with the Balto Jump Knee Brace
I’m not sure which brace to get for each leg?
This all depends on what your veterinarian recommends. It is important to consult with them so they can give the best advice and monitor the healing progress of your fur pup.
A clean brace not only prevents infections, irritation, and a stinky smell; but it also allows your brace to last longer. To help support the longevity of your bracing device, here are some of our tips on how to properly clean your orthopedic bracing:
Remove as much hair as possible from any Velcro® frequently to prevent compaction.
Use lint roller or lightly adhesive tape to remove hair from the material of the brace.
By hand, use warm water and a gentle cleansing soap to remove any stains and odors.
Rinse soap thoroughly from the brace
Hang to dry. Once the brace is completely dry, it is ready for use!
How Do we Stack Up?
US vs THEM
Many Sizes Available
Non-NeopreneMaterial
Stabilization Splints
Irritation resistant Clasps
✓
✓
✓
✓
✗
✗
✓
✗
✗
✗
✗
✓
✓
✗
✓
✗
✓
✓
✗
✗
✓
✗
✓
✗
✓
✗
✗
✗
See if your pet insurance will cover a prescription for Balto®
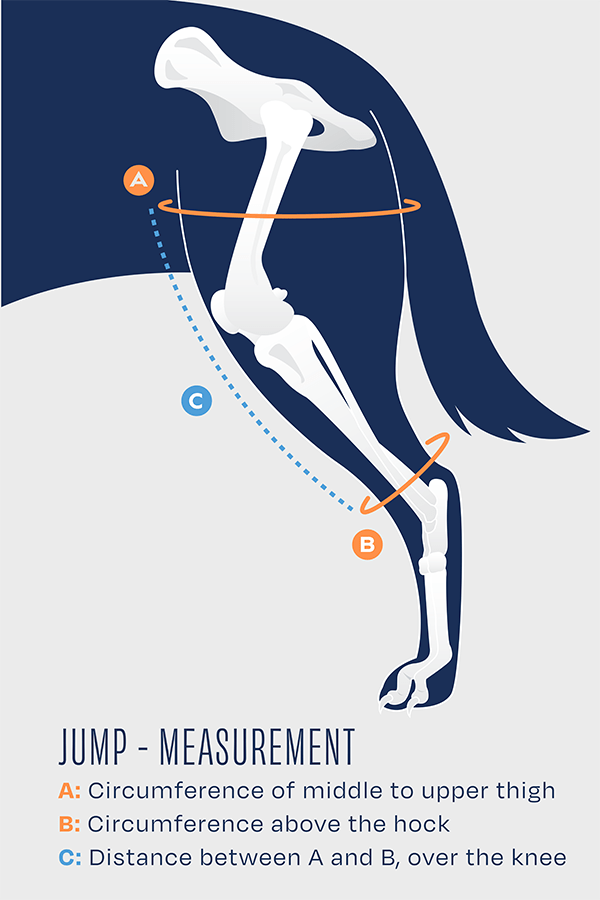
Measurement A: Circumference of middle to upper thigh Measurement B: Circumference above the hock Measurement C: Distance between A and B over the knee
Balto Ligatek
SIZE
WEIGHT
A
B
C
Small
20 - 35 lbs
8.25" - 10"
3" - 6"
4.3" - 5.5"
Medium
35 - 65 lbs
10" - 12"
4" - 6"
5.5 " - 7"
Large
60 - 110 lbs
11.5" - 13"
4.75" - 7"
6" - 8.75"
X-Large
110+ lbs
14"+
--
6.3" - 9.25"
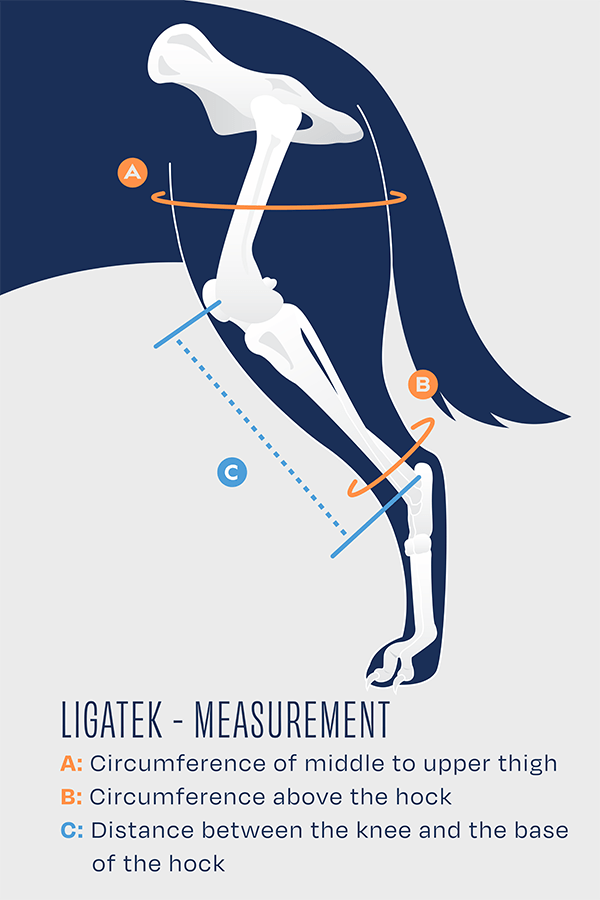
Measurement A: Circumference of middle to upper thigh Measurement B: Circumference above the hock Measurement C: Distance between the knee and the base of the hock
Balto Jump
SIZE
WEIGHT
A
B
C
XX-Small
2-5kg
8-13 cm
3-5 cm
8 cm
X-Small
5-10kg
16-18 cm
5-7 cm
10 cm
Small
10 -15kg
21-25 cm
8-15 cm
15 cm
Medium
15 -30kg
26-31 cm
10-16 cm
18 cm
Large
28 –50kg
29-34 cm
12-18 cm
22 cm
X-Large
Over 50kg
over 36 cm
--
25 cm
Measurement A: Circumference of middle to upper thigh Measurement B: Circumference above the hock Measurement C: Distance between A and B over the knee
Balto Ligatek
SIZE
WEIGHT
A
B
C
Small
10 -15kg
21-25 cm
8-15 cm
11-14 cm
Medium
15-30 Kg
26-31 cm
10-16 cm
14-18 cm
Large
28–50 Kg
29-34 cm
12-18 cm
15-22 cm
X-Large
Over 50Kg
Over 36 cm
--
16-23 cm
Measurement A: Circumference of middle to upper thigh Measurement B: Circumference above the hock Measurement C: Distance between the knee and the base of the hock
Instructions for Use
Step 1
Start by removing the anchor kit and applying the Jump to the left leg (see Jump "Instructions for Use") (Fig. 1 & 2).
(Fig. 1).
Step 2
(Fig. 2)
Step 3
From the Ligatek, keep only the back strap and remove the anchor that would wrap around the contralateral leg (Fig. 3)
(Fig. 3)
Step 4
Apply the Ligatek to the right leg (see Ligatek "Instructions for Use") (Fig. 4).
(Fig. 4)
Step 5
Apply the Velcro to the top of the Ligatek and add the back strap over the dog’s back (Fig. 5).
(Fig. 5)
Step 6
Insert it into the top buckle of the brace and tightly close with the Velcro strap (Fig. 6).
(Fig. 6)
Step 7
The back strap is adjustable: Remove the Velcro end and cut the strap to the desired length. Reapply the Velcro end and tightly close with the Velcro strap to ensure the brace is stable (Fig. 7 & 8).
(Fig. 7)
Step 8
(Fig. 8)
Step 9
Pass the collar strap under the collar or harness and attach the other strap under the back strap (Fig. 9-11).